Christmas is coming….

Sorry to those of you rolling your eyes at my post but quite frankly unless you are gonna go hide in a hole in the ground it is! Why not just make it your own? Mr G hates a commercial Christmas and I do also if we are taking expensive items forcing you into huge debts. Its one day, enjoy it your way. Of course I mean cook yourself up a festive wonder!

Now quite frankly this year, being a student, I am “muchos skintos” and therefore I am doing a lot of homemade. Three of my fabulous ladies will be getting such gifts, with all their favourite treats made by yours truly. Therefore, I thought why not share these ideas with you and see if you can save yourself some stress and add a little of yourself to your gifts. Please note that sneezing into your recipes is taking this too far.

So here we are sacrificing the surprise a little for Elaine, Megan and Lesley all in the name of education.

Peace out


P.s. I am going to be jazzing this blog up soon apologies until its finished!

Spicy Sweet Potato Chips (fries)

These are amazing. A Mr G favourite, they are fantastic with meat, a salad and even just for dipping if sliced thin enough. Sweet potatoes are so under used in the U.K.; we are much more likely to buy and use a typical blighty “spud”. Sweet potatoes are so versatile!

This recipe will feed however many people you want it too. I know that sounds vague but it’s true. What I mean is, the size of your sweet potatoes and what you want it be, will influence how many mouths you can feed with one potato. I would make one potato per person as an accompaniment with a meal. Conclude from that what you will.

I should point out that when I make these tasty tatties I wing it with the seasoning. In fact that is my philosophy with most of my cooking, although I do try and keep things measure when I write to you lovely folks.

You will need:

One Potato per person
One tablespoon of low fat oil
Pinch of Salt
Pinch of Pepper.
(One tablespoon Cajun spice – Optional).

Preheat your oven to 200 degrees celsius.

  • Peel and wash the sweet potatoes.

Top Tip: You can leave the skin if you want and actually it is a good source of fibre to do just that!

  • Cut into strip – remember the size and thickness of your chips will determine how long they take.
  • Pop them into an oven tray and add ONE tablespoon of low fat oil.
  • Add salt, pepper and a desired spice – we like to use cajun spice!

  • Mix around with your hands to make sure all the chips are coated.
  • Pop your oven tray into your preheated oven
  • Cook for approx 30-40mins until golden brown.

Now when you take them out don’t worry if they aren’t as solid as a regular chip – the matrix of the potato makes a whole different texture.

Now they aren’t ready to decorate your plate and entice your tastebuds!

For crisps (chips for my overseas friends) just cut the potato in thin strips – even try a vegetable peeler!

So there you have it! Give it a go and let me know what you think!

Any questions, just ask!

Ciao!

Sorry seems to be the hardest word.

Okay so first of all I apologise for my absence on here but duty has called me to my placement in Lochinver on the west coast of Scotland. By no means is my home a busiling hub of activity but this beautiful part of the world is rural and therefore I am cut off from internet access, hence, no feeding you hungry people! Apologies if you have gone hungry, but I wonder how many of you have tried my previous recipes in this time…? My time up here has kindly allowed me to watch A LOT of inspirational food related television. Of course, this has given me a host of yummy, healthy ideas for you all.
British television seems to be full of the idea of baking and cooking at the minute, a lot centered on the idea of British produce. I think this is a brilliant idea! The idea that everything on my plate has been home-grown on Old MacDonald’s Farm down the road gives me such inspiration. We import so much of our everyday diet and often we don’t use, or know how to use, the items we grow ourselves! We should be supporting our home nations; Britain and elsewhere! One such programme is The Great British Food Revival. If you haven’t seen this, it is definitely worth a look! 

Stay tuned over the next week while I try to make it up to you by letting you back in my kitchen! 🙂

If anyone wants to see where I am – http://www.undiscoveredscotland.co.uk/lochinver/lochinver/

Orang – you – can!

Image

Hello my lovely kitchen loiterers. I have been quiet lately but this is because I have been studying my healthy butt off for exams next week – forgive me. Here is a lovely little recipe that I “invented” and again, force fed my family and friends until I was satisfied it was suitable for you all.
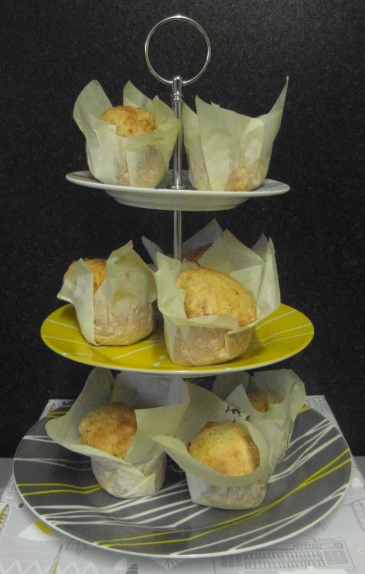
I also need to point something out;  who likes my new cake stand?  My lovely friend Megan bought it for me! Thanks Megaroni!

You will need:

75g melted butter
2 oranges – juiced and zested
1 beaten egg
100g peeled and grated carrots
300g plain flour
2 tsp baking powder
100g caster sugar
1/2 teaspoon cinamon

Pre-Heat the oven to 190C/fan 170C/gas 5.

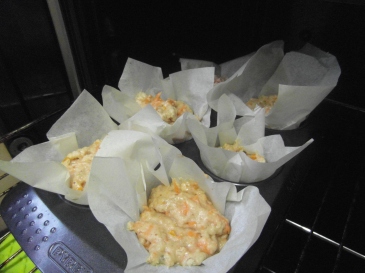
  • Line a 12-hole muffin tin with squares of baking parchment, pushing them down to make little cases.

Top Tip : Cut out square of parchment and push it down – makes a rustic little case!

  • Mix all the dry ingredients together in a large bowl with a pinch of salt.
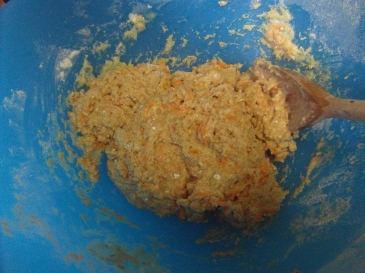
  • Whisk together the wet ingredients with the carrots then mix into the dry ingredients, but don’t overmix – it’s much nicer with lumps!Image
  • Spoon into the muffin tin and bake for 20-25 minutes until risen.Image

Top Tip: Make sure you use unwaxed oranges for the zest!

They really are that simple and they are so tasty – and of course, Healthy! I made this recipe up from the fact I had four carrots needing transformed into something magical. It really is that simple – most of my “made up recipes” come from something that needs used up before it goes off if I am honest!
From my calculations these muffins are about 3g of saturated fat! Hello!

These fruity muffins are perfect with a cup of tea on winter days – breakfast, brunch, lunch or a snack!

We need to talk.

You’ve had a few recipes from me now and I thought I would give you a little insight in to my philosophy and why I eat and cook the way I do.

I have always believed in a healthy lifestyle. This was mostly instilled in me from my gorgeous mother. She was always big on vegetables, fruits, pulses, good fats, sunscreen, limited alcohol, no to smoking…you get the message. To say its done her well would be an understatement. At 56 my mother could be in her 40s. She’s healthy, fit and other than a recent surgery lives a very active lifestyle. So Thank You Mum, you’ve got me started on something that I not only enjoy but will hopefully keep me safe and looking as fabulous as you when I am 56.

Down to business.

Being a Vegetabletarian.

As I have already stated I was a vegetarian (but ate fish) as a child. This was a choice made by my parents and we took a lot of stick for it. Don’t get me wrong I am not about to say that “veg prej” is the new racism but for goodness sake if I was called names and had my motives questioned once I had it a million times. We were on a diet of cheese and tomato pizza at friends houses; much to my pizza mad sisters delight.

I am no longer a vegetarian. I can’t really explain why I changed my mind about meat. I still don’t eat a lot of it and to be honest its only chicken, turkey bacon and the previously eaten fish that I eat now. Red meat? I don’t like the taste. However through my occupation ( I am a student nurse) I have  become of something a little more concerning. Have you ever seen the research links between red meat and colorectal cancer? I have and I am sorry, it ain’t pretty. Red meat is a staple of many peoples diets in the Highlands of Scotland and my colleagues locally have often noted the correlations between that and the high rate of colorectal cancer within this area.

Parkin (2011) found that 21% of colorectal cancers attributed to red/processed meat.

 I don’t know about you but thats not odds I fancy my chances with. The NHS provides some information on what the recommended amounts of red meat are now and I have included it at the bottom of the page where I have given you a little reference list….cute eh!

My love affair with Mr Gym

I have said once before that I was a gym enthusiast. I might have made a small understatement there. I love it. If it don’t go to the gym I miss it. I go in feeling crap and come out feeling a million dollars. I do a lot of weight lifting; I have done this for a few years but not to the standard I do now. My boyfriend has been a fantastic help to me with this and I am now in a position to build the body I have wanted for years. Thank You Darling. Basically, I am constructing myself a strong and lean body that can withstand a 12 hr shift, lifting patients and also look damn good in a strapless dress. I have been waiting a long time for results to appear but I have had 3 comments in the last week alone about how my shape is changing and how toned I look, so I am obviously doing something right! Having a functionally strong body is very important to me. I have a bad back for example, but with the improvement of my strength I am not longer as scared about moving certain ways and assisting patients. Gym work takes motivation. If you want your body to look a certain way sitting there doing nothing isn’t going to help. I will give you the same start I had with my body work; meet Jamie Eason http://www.bodybuilding.com/fun/jamie-eason-livefit-trainer.html. I started with this and went from there.

I love to cook and bake

I find it a productive way to vent frustrations, make something tasty and have the satisfaction of “I did that”. I should point out, I am bad loser in the kitchen and god if something doesn’t go right I am a huffy chef to say the least! But when it goes right, oh its amazing – considering I make most of it up!
That is what all this comes down to at the end of the day – that’s how you found me, how I found my voice and how you may one day eat something I showed you. I love that maybe I could spread the message that cooking doesn’t have to be a drag and healthy doesn’t have to be tasteless or plain. Spices give a dull meal a kick, fruits give a subtle sweetness and lip -smacking sauces compliment that meal you just made beautifully.

My boyfriend once said to me that “when you cook I feel better” – you tell me a better reason to do it!

So go on, forget what you think about healthy food, try something new and make yourself, and someone you love “feel better”

Love, M x

References (don’t show my lecturers; what a mess!)

Parkin DM, Boyd L, Walker LC (2011a) The fraction of cancer attributable to lifestyle and environmental factors in the UK in 2010: summary and conclusions British Journal of Cancer; 105:S77-S81.

NHS Advice page –  http://www.nhs.uk/Livewell/Goodfood/Pages/red-meat.aspx

We <3 Pizza.

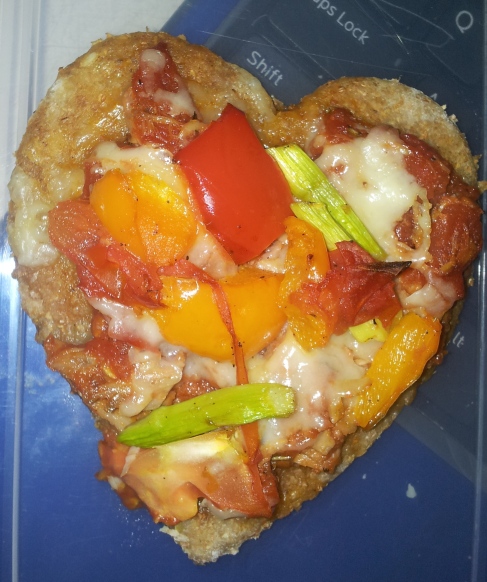
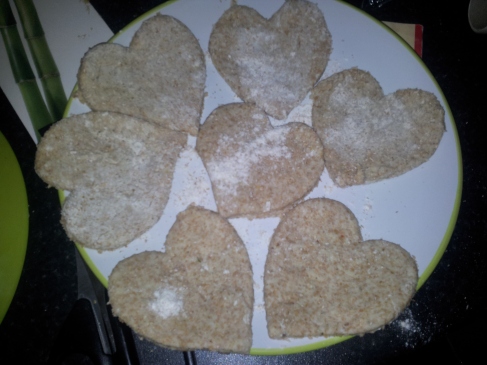
ImageThis is a pizza. I am not going to tell you how to top a pre-bought base, Oh no. I will tell you how I make mine so that you can then pop whatever delightful toppings you want! Sound good? Grand.

Now as you can see, I have made mine into little love hearts because I am a complete sap. However, my mix makes eight small pizzas or about two big ones.

You will need:

200g strong white bread flour
150g self raising flour
Pinch of fast-acting yeast.
2 tablespoons extra virgin olive oil
350ml warm water

For the dough:

  • Flour, yeast and 2 teaspoon salt into a large bowl and mix.
  • Make a well.
  • Mix the oil and water in a jug, then tip into the bowl.
  • Use a wooden spoon to work the liquid into the flour – it will seem pretty wet.
  • Set the bowl aside for 15 mins. Leaving the dough like this will save you from lengthy kneading later.
  • Turn the dough onto a well-floured surface, flour your hands, then knead it very gently for about 2 mins until it is fairly even, soft and bouncy.
  • When ready to cook, heat oven to 240C/220C fan/gas 9 or (as hot as it will go).
  • Dust a baking sheet flour. Split the dough into 8 or however you want them.

Pictured below is my love pizzas done with a cookie cutter.

Image

So here is the interesting bit – your toppings. Just put on whatever you like. The first picture was home made tomato sauce, cheese and the veggies from the fridge! Peppers, asparagus, tomato. Beautiful. We sometimes mix in a bit of chicken or tuna (all in the name of protein!) and whatever else we fancy.

To make a tomato sauce try a tin of chopped tomatoes, tablespoon of tomato purée and some cooked off onions. I am not going to tell you in stone what else to put in because its all about trial and error for your tastes. I would use salt and pepper, bit of italian seasoning, basil maybe? Depends what kinda mood we are in ; spicy, not spicy.

PLEASE REMEMBER THAT IF YOU ARE USING RAW MEAT IT WILL NEED COOKED SEPERATELY AND ADDED AT THIS POINT!

Once you have your topping organised and ready to go its just a case of popping it onto you pizza base; sauce, cheese, topping and away you go. Cook for about 12 mins in the hot oven until nice and brown round the edge and the cheese is all melted and lovely!! 

This is a super yummy recipe and we use it for packed lunches and dinners.

Again these numbers aren’t 100% and depend on what you use but here’s a rough idea of what your a saving!

231 kcalories, protein 6g, carbohydrate 45g, fat 5 g, saturated fat 1g, fibre 3g, sugar 3g, salt 0.53 g

I have made a couple of extra bases and tried freezing them – this is the first time I have done this so I will let you know how they come out once defrosted!

Hope you enjoy it.

 Need Help Ask
Ciao!

Cheesecake? A Cake…made of cheese?

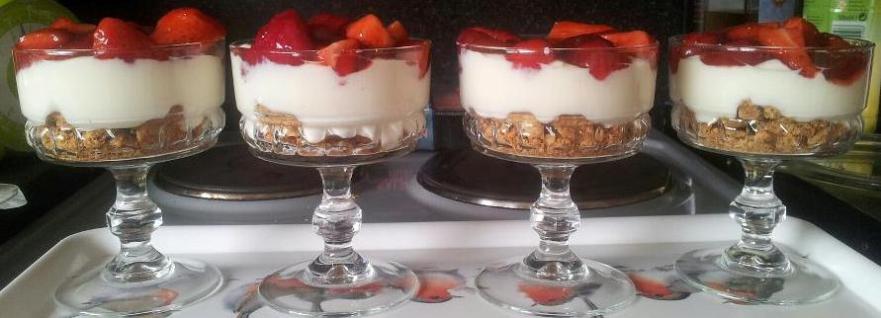
Image“Would you like to see the sweet menu?” “Oh no thank you, I’m full.” No your not, you lying little parsnip!

Life is too short not to indulge responsibly; remember all those men and women on the Titanic that waved off the dessert tray.


Goodness you know me so well, of course I am not trying to tempt you with a full fat cheesecake. Lets not be silly about this! I am offering you the chance to make and eat a cheesecake – guilt free! And no, it doesn’t taste “healthy”, it tastes as cheeky as cheesecake is meant to. 

You will need:

85g low-fat biscuits (I use oat biscuits as they give a lovely rough base)
200g tub extra-light soft cheese
200g tub 0% fat Greek yoghurt
4 tablespoons of caster sugar
3 drops vanilla extract
2 tablespoons good-quality strawberry/raspberry jam
100g strawberries/raspberries

  • Put the biscuits in a plastic bag and bash with a rolling pin until you have chunky crumbs. Divide between 4 glasses, small bowls or one big bowl.
  • Mix the soft cheese, yoghurt, sugar and vanilla together until smooth. Spoon over the crumbs.
  • Stir the the jam in a bowl until loose, then gently add the strawberries.
  • Divide the strawberries between the cheesecakes and serve.

    Make it your own:

You really can add what ever you want to these to reflect your tastes. Slice bananas,lemon juice and a spoonful of caramel sauce will make a lovely Banoffee Cheescake for example….not quite as low fat though! 

So you want to know the numbers? These depend on the products you use .

263 kcalories, protein 12g, carbohydrate 43g, fat 6 g, saturated fat 3g, fibre 1g, sugar 31g, salt 0.93 g.


See I hate to say I told you so but well, I did! 

Enjoy ladies and gents.

Need Help – just ask.

Ciao!

Holy Hollandaise Batman!

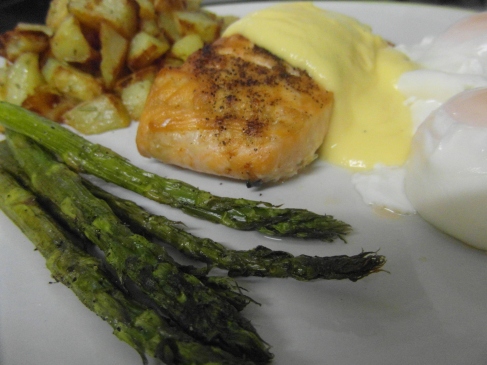
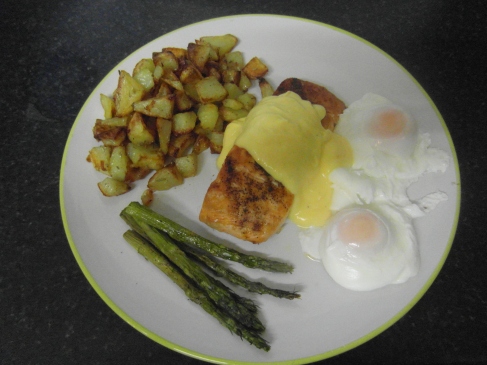
ImageMy mother, ever the pessimist, didn’t believe I made my own Hollandaise sauce. “Its so tricky to make, surely yours is from a packet!” Charming mother. I do make my own, and to anyone who has ever tried and failed, follow my method because it works a treat! Its beautiful with poached eggs, asparagus and salmon. Hence the reason I put these lovely items together to create one of our favourite meals here at “Casa del me and him”.

Grilled Salmon with Poached Eggs, Grilled Aspargus, Rosemary Potatoes and Hollandaise Sauce.

Sounds good yes? Let me show you how. Now, I must point out the this take a little bit of jiggery pokery to get the timings of all these pieces right but don’t panic, take it slow and easy. Salmon is such a versatile fish and you will see it come up again and again throughout my blog – its so yummy! My recipe serves 2 but you can easily adjust the servings to make it for more.
Note: this recipe contains raw eggs

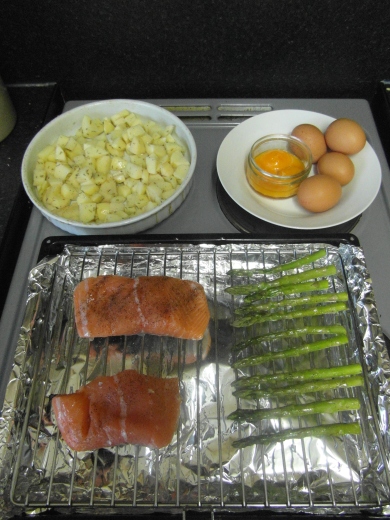
You will need:
Image

4 eggs
2 Salmon Fillets
300g Maris Piper potatoes
10 Asparagus Spears (or as many as you want!)
One tablespoon Olive Oil
Rosemary
Salt and Pepper

For the Hollandaise Sauce:

2 Tablespoons white wine vinegar
2 Tablespoons lemon juice
3 egg yolks
Salt and Pepper – Pinch of each.
100g Butter.

To Make the Rosemary Potatoes (40-50mins) –       

  • Peels and wash your potatoes.
  • Now cut into small cubes and place in an oven tray.
  • Pour in a tablespoon of olive oil and mix through the potatoes so they are all coated….yes with your hands!
  • Now simply season the cubes with rosemary, salt and pepper.
  • Place in oven and cook for 40-50 mins, until golden brown.

While they are cooking lets start with the rest of your meal. This is where the timing takes a little bit of work. They all take about the same time so check the times of each to do and plan accordingly.


To Cook the Salmon (10-15mins) –

  • Heat your grill to a medium heat about 10 mins before you want to cook the salmon.
  • Place your salmon on the grill tray.
  • Rub salt and pepper onto the salmon and well…that’s it.
  • Cook under the grill, until pink right through and browned on top.

To Poach the Eggs (10-12mins) –

  • Bring a frying pan of water to the boil.
  • Once it has boiled allow it to cool so its not longer bubbling.
  • Add 4 tablespoons of white wine vinegar.
  • GENTLY crack the eggs into the still water from a low height.
  • Allow to cook until the eggs are white all over – they should have a white covering over the yolk also.
  • Do not be tempted to remove them too soon or they will still have a raw top – if the top still looks raw GENTLY splash a bit of water over them until white.
  • Once they are white, take a “spoon with holes in it” (I am sure it has a technical name but I’ll be damned, I don’t know it!) and drain of water gently before putting it on the plate.


To Grill the Asparagus (5min-10mins) –

  • Wash the asparagus.
  • Coat in oilve oil and season with salt and pepper.
  • Place under the grill.
  • Cook for 5-10 mins (depending on your grill) or until brown

To Make the Hollandaise Sauce (10-15mins) – 

  • Start by placing three egg yolks in a small bowl, seasoning with a pinch of salt and pepper.
  • Place in a food processor or blender and blend thoroughly for about 1 minute. Switch off the blender
  • Now, in a small saucepan, heat the lemon juice and white wine vinegar until simmering.
  • Switch your blender back on and SLOWLY pour you hot mixture in to the egg yolks. Switch off the blender
  • Using the same saucepan, melt the butter over a gentle heat – careful not to let it brown.
  • Once the butter is “foamy”, switch on the blender again and pour the butter in. Again – SLOWLY!
  • Once all the butter is in, wipe around the sides with a spatula to make sure all the sauce is incorporated.
  • Give the sauce one more quick burst and TAA DAAH -a lovely, smooth, thick, buttery sauce.

Image

So there you have it, go and prove your Mamas wrong!

I know this recipe looks long and apologise if I have explained stuff that you know – for example I know my best friend is a massive poached egg fan and will be cursing my long drawn out explanation…BUT TOUGH!

Enjoy!

Need Help – Ask!

Peace out

(That wasnt going to be my catchphrase until it annoyed my sister – apparently I am not cool enough.)

Lots of Love, Morven x

Much A-Dough about Muffin

Image

When I was a little girl, my sister and I would make “cakes” at nursery school. Sadly these cakes where made of raw flour, water and salt, and my father and mother being the amazing parents they were, used to pretend they were the most appetising cake they’d ever seen, even eating it. So last night when I took these “invented” muffins to my parents house,  I explained that although they were acting as my guinea pigs, this wasn’t a “cake” kind of moment. Resounding success with both parents and Mr G ( my food-loving man).

Technical Bit – I apologise in advance for what I am about to say but I am nurse so my “social acceptable body talk line” is VERY low.  Wholewheat flour and wholemeal cereals are a good source of fibre; crucial to a healthy digestive system. Its important to *ahem* keep “that train moving” and these muffins are a tasty and quick alternative to a bowl of cereal. Remember if you are going to up your daily intake of fibre stay hydrated!

Sorry…right onto the good bit.

Pre- heat your oven to 180c/ Gas Mark 4. When pre-heating an oven its always best to do so 20 mins before you plan to cook/bake as it allows optimum temperature to be reached.

You will need:

200g Self Raising Flour (or wholemeal self raising)
Two small handfuls of Bran Flakes (crushed)
1 Teaspoon of Bircabonate of Soda.
100g Light Muscovado sugar
2 Beaten Egg whites
150ml of milk
200g fresh raspberries
1 Teaspoon Vanilla Extract

This mixture makes APPROXIMATELY 12 muffins.

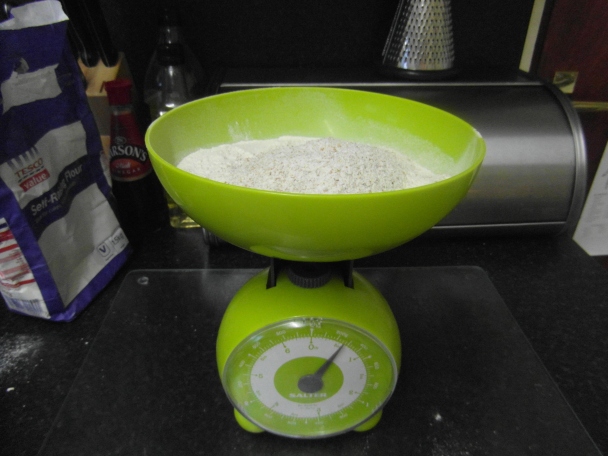
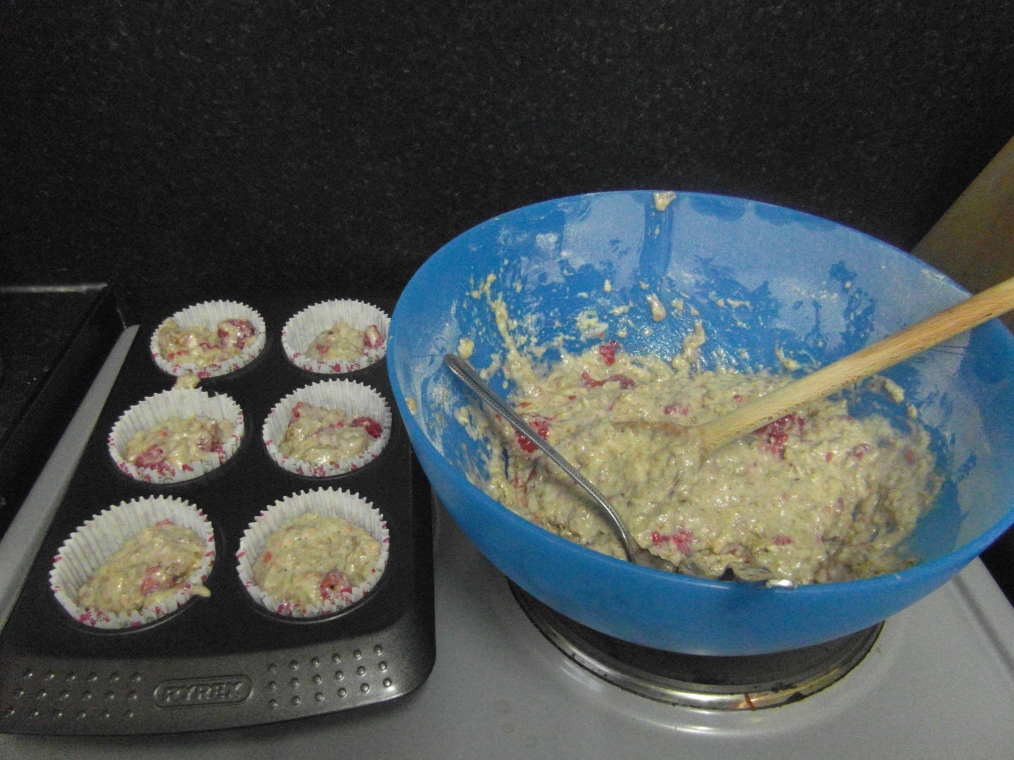
  • Mix the flour and bicarbonate of soda in a large bowl.Image
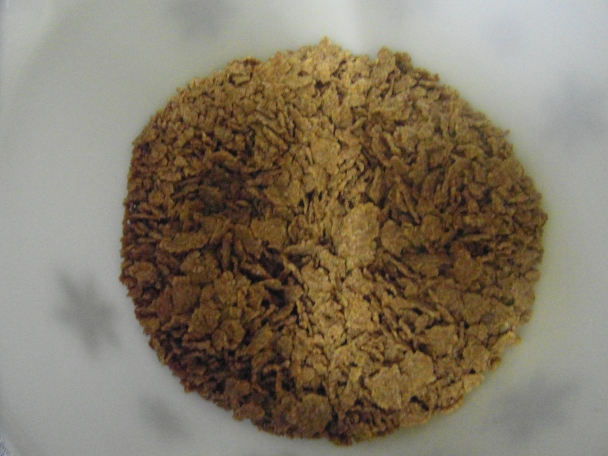
  • Now add the bran flakes and sugar and mix well with a wooden spoon.Image
  • Make a well in the middle and pour in your beaten eggs.
  • Add your milk and vanilla extract into the mixtureImage
  • Now add your raspberries, keeping a few back for topping and mix well.
  • Spoon into muffin cases – you want about a tablespoon of mix in each case, don’t be tempted to overfill.
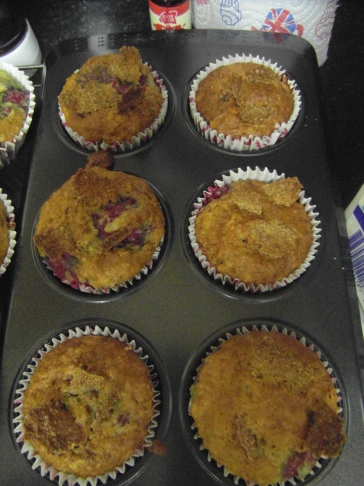
  • Bake in the oven for 18-20 or until golden brown.

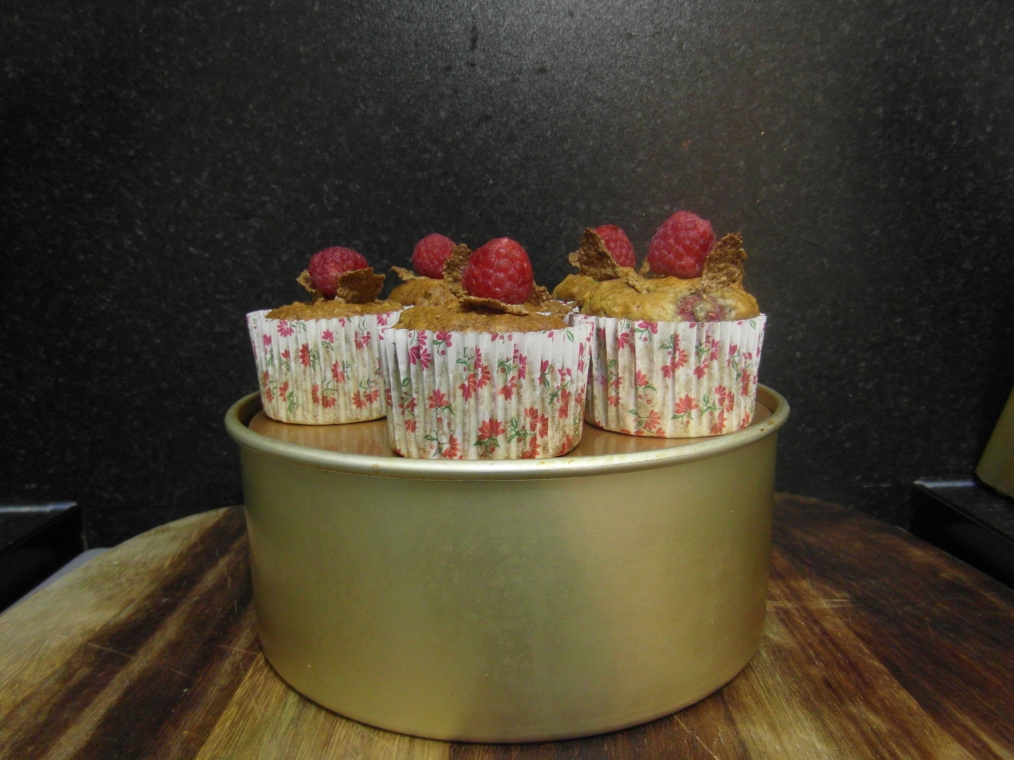
    Image

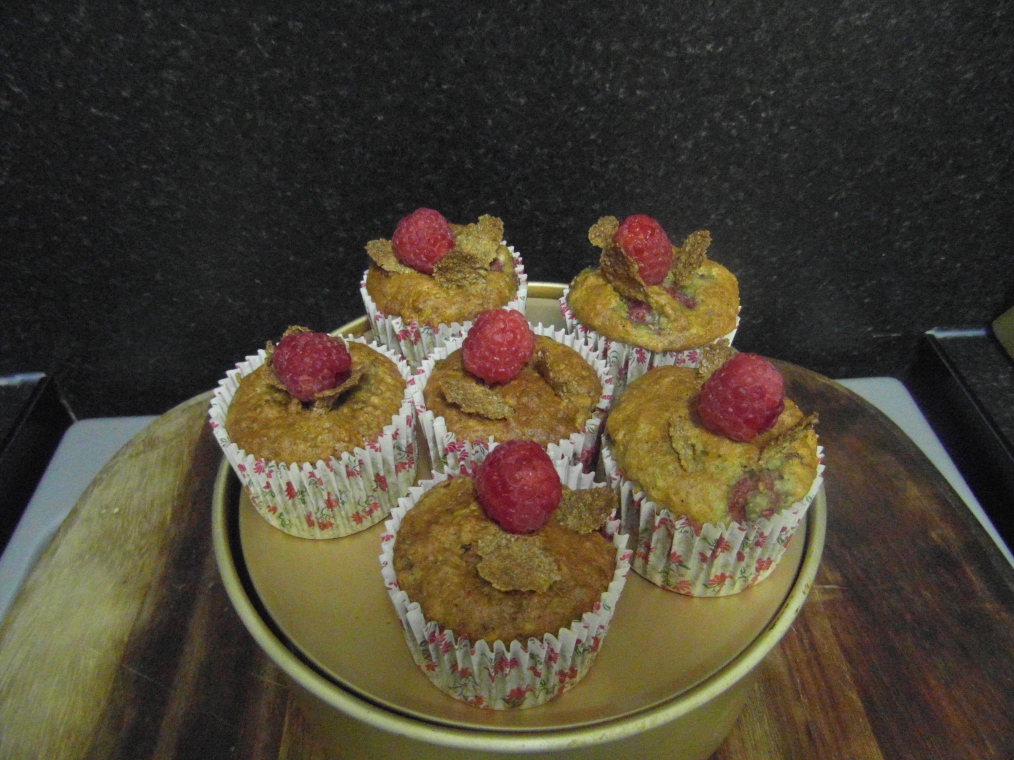
    Here I added decorative bran flakes to the top. Add one in the middle and then skewer a raspberry on top!

These muffins come out lovely and crunchy on the top and soft in the middle, with beautiful marbled raspberries throughout. They are beautiful (even if I do say so myself).

I don’t have the exact nutritional information for this treat as I made it myself but I will tell you they contain LESS THAN 0.8g saturated fat per muffin.

Image

Et Voilà! A healthy on the go muffin to keep you going till your next meal.

Enjoy people. Need help – Just ask.

Peace out,

Morven x

 Notice how we are only using the egg whites here… what am I going to do with those yolks? Watch out for my next post… hollandaise sauce!

My Banana Bread.

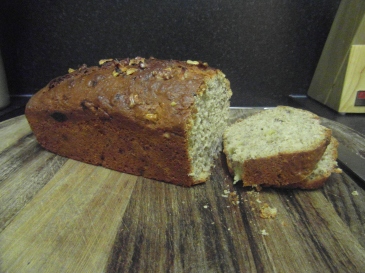
ImageSo here it is. The secrets to my banana bread, my boyfriends kryptonite. He claims that although it didn’t make him fall for me, “it didn’t hurt”.  P.s. This is NOT one of my healthy ones!

Pre- heat your oven to 180c/ Gas Mark 4. When pre-heating an oven its always best to do so 20 mins before you plan to cook/bake as it allows optimum temperature to be reached.

You will need:

200g Self Raising Flour
1/4 Teaspoon of Bircabonate of Soda.
75g of Butter/Margerine
175 Light Muscovado sugar
2 Beaten Eggs
450g Mashed Bananas
(Add walnuts if desired – not crucial)

  • Mix the flour and bicarbonate of soda in a large bowl.
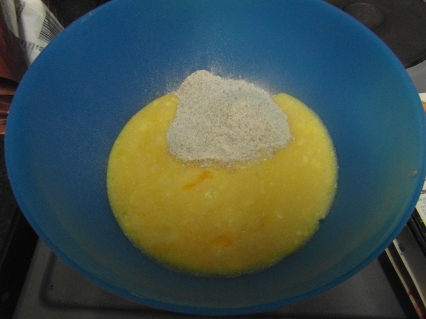
  • Now, in a seperate bowl, cream the butter and sugar until fluffy slowly adding the eggs, alternating with the flour.
Image

Okay so I am not the neatest when I bake but you get it… Flour, Egg, butter and sugar.

  • Now add the mashed bananas.

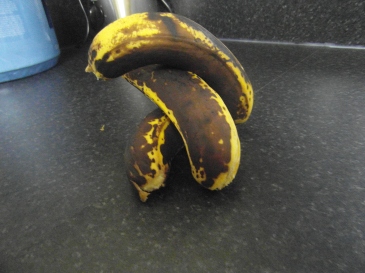
Top TipYou want your bananas to be turning pretty brown to make this flavour stand out. Like this…

Image

See…brown. I have been known to use bananas much darker than this – “two days before they get legs and walk from the worktop” kinda brown

  • Grease a loaf tin (recommend 20.5cm x 12.5cm) with butter or margerine.

Top Tip – Make sure you are quite generous with the greasing. Its awful when your bread falls apart because it got stuck! I have used greaseproof paper before but I prefer just butter now.

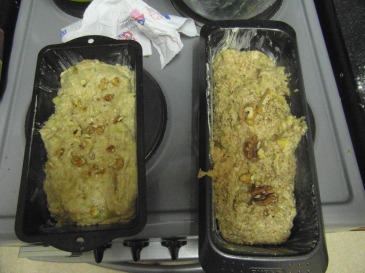
  • Pour your mixture into the tin and place in the oven.

Image

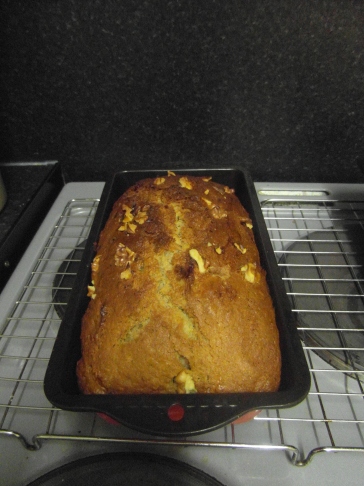
  • Cook for 1 hours 15 mins or until golden brown and cooked through

Top Tip. – A good way to test if your food is ready is to “stab” the loaf and slowly remove the knife. If it comes out clean, your bread is ready, if it comes out “goey” pop it back in for a little while. Repeat until ready.

Image

Almost there!

  • Once the banana bread is cooled, slide a PLASTIC spatula around the edges until it begins to come loose, don’t force it.

Top TipIf you use a metal knife to loosen it you will scratch your tins – trust me, I’ve done it.

  • Slowly tip out onto a wire tray to cool.
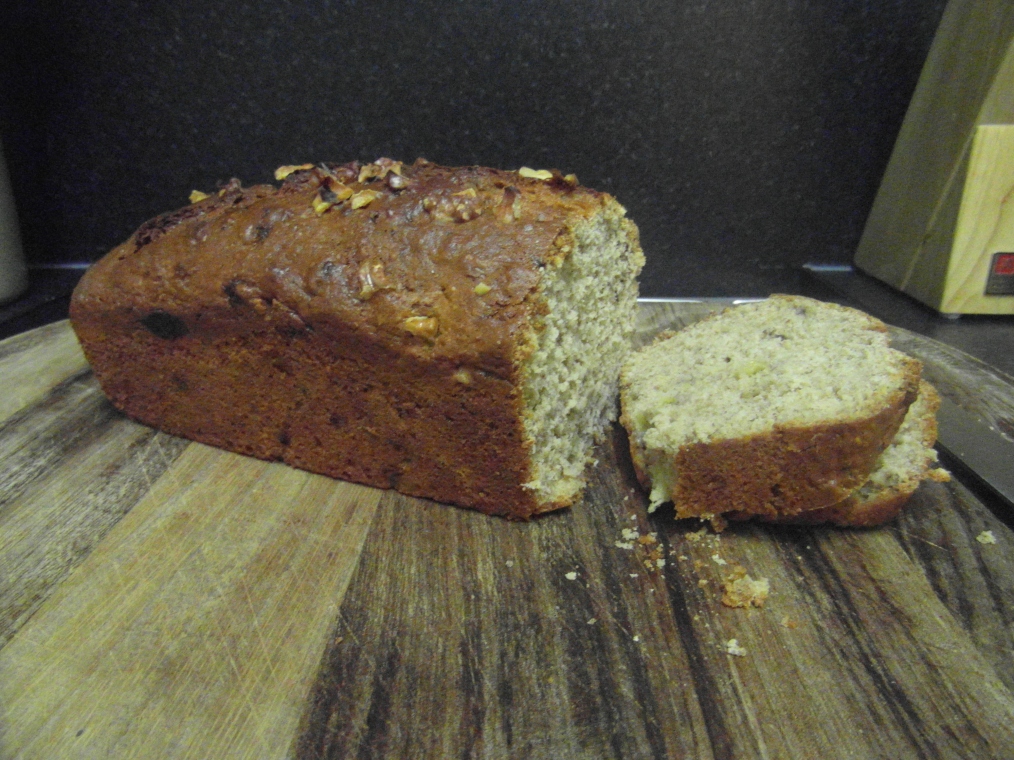
  • Leave for 24 hours for best results, cut and serve with butter or plain. Oh and a cup of tea. Obviously!
  • Alternatively, freeze for up to 3 month for an impromptu yummy.

Image


So there you have it, my much loved banana bread to you!

         Need a hand? Just ask!

         Peace out,

         Morven x